
Shower diverter not working: why water runs from the spout and how to fix it
A shower diverter is the gate that sends water up to the showerhead instead of out the tub spout, and when it fails, water runs from both outlets at once because the gate can no longer seal off the spout. There are two types: a tub-spout diverter, the pull-up knob on the spout itself, and an in-wall diverter valve operated by a third handle on the wall. Mineral scale coating the gate is the most common reason it stops sealing, so the first fix is to soak the spout in white vinegar to dissolve the deposits. When that does not work, the repair depends on the type: a tub-spout diverter means replacing the whole spout, while an in-wall valve means replacing its cartridge. A failed diverter wastes water continuously — according to Dalmatian Plumbing, on the order of 15 to 30 gallons per shower and $100 to $200 a year. This guide explains the both-outlets symptom, the two diverter types, the vinegar fix, the spout-versus-cartridge decision, the waste figures, and a step-by-step diagnosis.
Last reviewed: 2026-06-04
Why does water come out of both the spout and the showerhead?
The diverter gate has failed and can no longer seal off the tub spout, so water takes both paths at once instead of being forced entirely up to the showerhead.
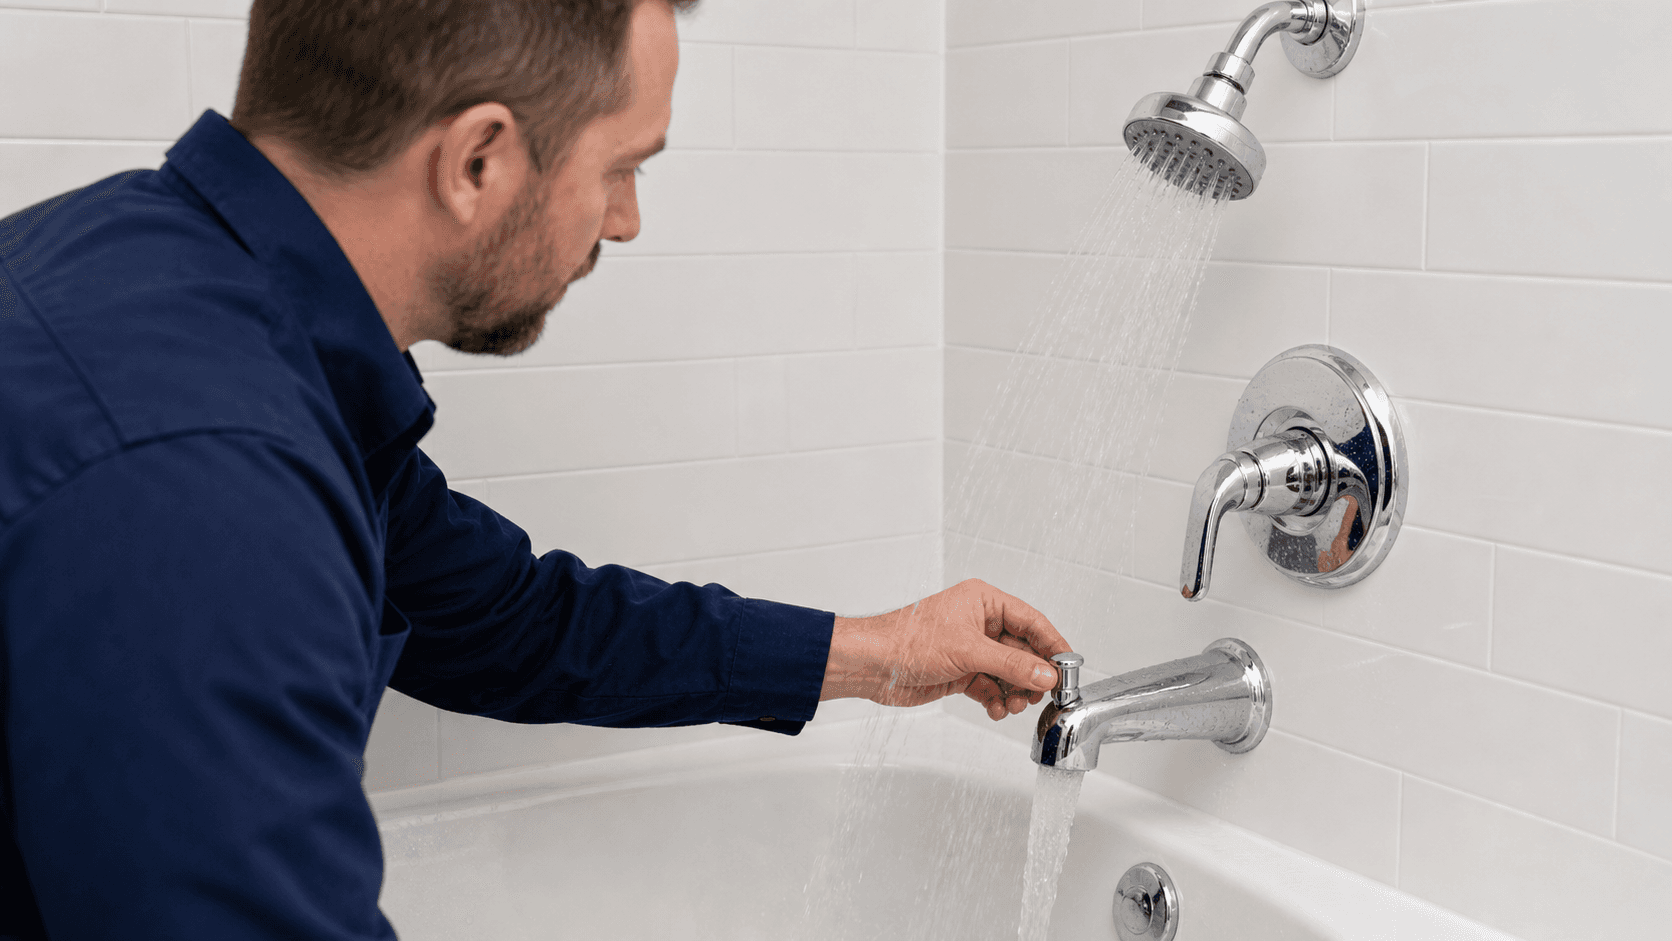
When you pull the diverter to switch from tub to shower, a gate inside is supposed to block the path to the tub spout, forcing all the water up to the showerhead. Water coming out of both outlets at once means that gate is no longer sealing: instead of closing off the spout completely, it leaks, so the water splits and some runs out the spout while the rest goes up to the head. The shower feels weak because it is only getting part of the flow, and the spout dribbles because it never fully closed.
The reason the gate stops sealing is usually buildup or wear on the sealing surface. Mineral scale coats the diverter gate and the surface it seals against, holding it slightly open so water leaks past; over longer use the gate's seal can also wear or the mechanism can corrode and stick. In every case the result is the same — an incomplete seal that lets water take both paths — which is why the both-outlets symptom is the defining sign of a failed diverter rather than any other shower fault.
This symptom is specific enough to be diagnostic on its own. A weak shower with a dry tub spout is a clogged head or a worn cartridge, a whole-house pressure problem, or a supply issue; a weak shower with water actively running out of the tub spout at the same time is the diverter, because only the diverter governs the split between the two outlets. The water escaping out the spout is the tell that separates a diverter failure from the other causes of weak shower flow.
Because the diverter is the part that fails here, the fix is at the diverter, not at the showerhead or the supply. Cleaning the showerhead or checking house pressure does nothing for a diverter that will not seal, so confirming the both-outlets symptom points the repair directly at the gate — whether that is a tub-spout diverter or an in-wall valve, the two types the next section distinguishes.
What are the two types of shower diverter?
A tub-spout diverter is the pull-up knob built into the spout itself; an in-wall diverter valve is operated by a separate third handle on the wall and uses a cartridge behind it.
The first type is the tub-spout diverter, the most common in tub-shower combinations. It is the small knob or lever on top of the tub spout that you pull up to send water to the showerhead; inside the spout, pulling the knob raises a gate that blocks the spout outlet and routes water up to the head. Because the diverter mechanism is built into the spout, this type is identified by that pull-up knob on the spout and is repaired by dealing with the spout itself.
The second type is the in-wall diverter valve, operated by a separate handle on the wall rather than by a knob on the spout. In this design there is a third control — beyond hot and cold, or beyond the single mixing handle — that you turn to divert water from the spout to the showerhead, and the diverting is done by a cartridge or valve inside the wall behind that handle. This type is identified by that extra wall handle and is repaired by servicing the valve behind it rather than the spout.
Telling the two apart is straightforward and determines the repair path. If the control you use to start the shower is a knob you pull up on the tub spout, it is a tub-spout diverter; if it is a separate handle on the wall, it is an in-wall diverter valve. Some showers without a tub also use a wall diverter to switch between outlets like a handheld and a fixed head, but the same identification holds — a spout knob means spout-type, a wall handle means valve-type.
The reason the distinction matters is that the two types fail and are fixed at different parts. A tub-spout diverter's gate is inside the spout, so a failed one is fixed by replacing the whole spout — an inexpensive, simple swap. An in-wall valve's gate is in a cartridge behind the wall handle, so a failed one is fixed by replacing that cartridge — a more involved repair. Identifying the type first is what tells you whether you are buying a spout or a cartridge, which the repair sections below cover.
How do you fix a shower diverter?
First soak the spout in white vinegar to dissolve the mineral scale coating the gate, since buildup is the most common reason a diverter stops sealing; clean and retest before replacing parts.
Before replacing anything, the first fix is to clear mineral scale, because buildup on the diverter gate is the most common reason it stops sealing. White vinegar is mildly acidic and dissolves the limescale and mineral deposits that coat the gate and hold it open, so soaking the diverter in vinegar often restores the seal without any new parts. This is the cheapest fix and the right first move, exactly as it is for a scaled showerhead.
For a tub-spout diverter, the practical method is to get vinegar into the spout and around the gate. You can fill a bag with white vinegar and tie it over the spout so the diverter mechanism is submerged, or remove the spout and soak it in a container of vinegar; letting it sit for several hours — overnight for heavy buildup — gives the acid time to break down the deposits holding the gate open. Working the diverter knob up and down during and after the soak helps free the loosened scale.
After soaking, flush and test before deciding on a replacement. Run the shower, work the diverter through its full travel, and check whether the spout now seals when the water is sent up to the head; if the both-outlets leak is gone, the scale was the problem and the fix cost nothing but vinegar. Many diverter complaints resolve right here, which is why descaling comes before any parts are bought or the spout is pulled.
If the vinegar soak does not restore the seal — the spout still leaks with the diverter engaged after a thorough descaling — the gate or seal is worn rather than merely scaled, and the fix moves to replacing a part. Which part depends on the type identified earlier: the whole spout for a tub-spout diverter, or the cartridge for an in-wall valve, which the next section covers. Cleaning first simply ensures you do not replace a part that only needed descaling.
When do you replace the spout versus the cartridge?
A tub-spout diverter that descaling did not fix means replacing the whole spout; an in-wall diverter valve means replacing the cartridge behind the wall handle.
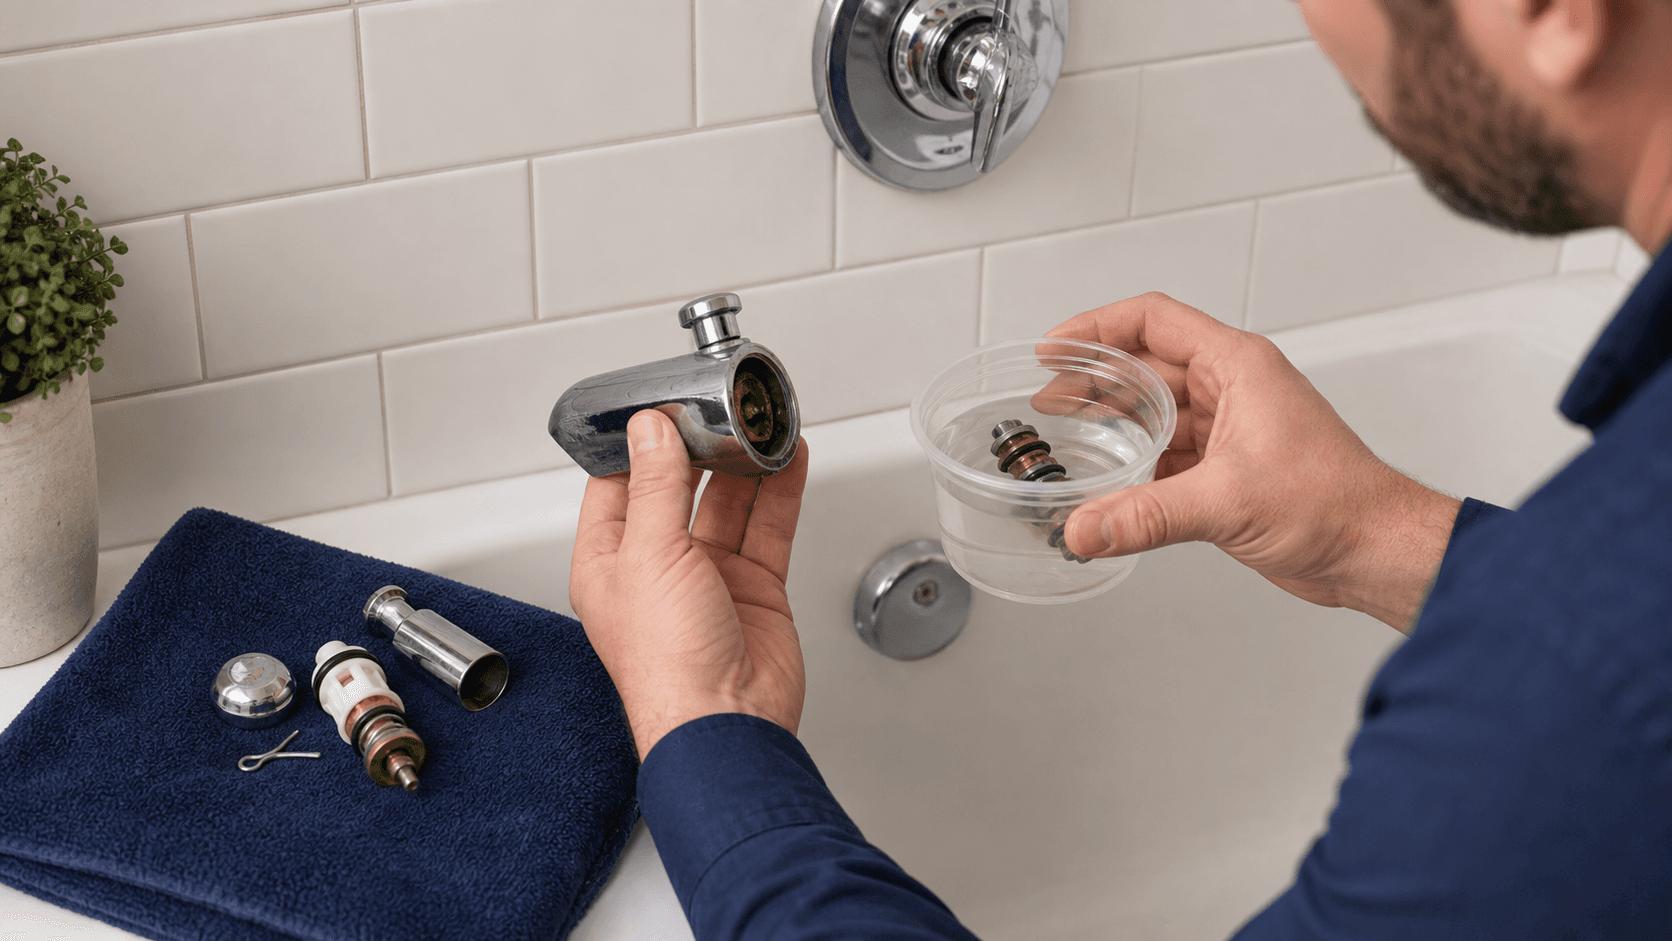
Once descaling has failed to restore the seal, the repair is a part replacement, and the type of diverter decides which part. For a tub-spout diverter, the gate is built into the spout and is not separately serviceable, so the fix is to replace the entire tub spout. This is an inexpensive and simple repair: the old spout is unthreaded or unclamped from the supply nipple and a new spout with a working diverter is installed in its place, restoring the seal with a new gate.
Replacing a tub spout is among the easier plumbing repairs because the spout is fully accessible and comes off without opening the wall. Most spouts either thread onto a pipe nipple or are held by a setscrew underneath, so removal and replacement are a matter of the right turn or the right hex key, with thread sealant on a threaded connection. Because the whole diverter mechanism comes with the new spout, there is no need to match an internal part — the spout is the part.
For an in-wall diverter valve, the gate is in a cartridge behind the wall handle, so the fix is to replace that cartridge rather than the spout. The handle and trim are removed to reach the cartridge in the valve body, the old cartridge is pulled, and a matching new one is seated — the same kind of cartridge service as a shower valve repair, and brand- and model-specific in the same way. This is a more involved repair than swapping a spout because it means working in the valve behind the wall and matching the correct cartridge.
The decision is therefore set by the diverter type, not by preference. A spout-type diverter is a spout replacement, simple and accessible; a valve-type diverter is a cartridge replacement, more involved and dependent on matching the part. A wall-valve cartridge that is mineral-seized in the body, or an unfamiliar valve brand, is the point where the repair is better booked as faucet and fixture repair in Bellevue, much like any shower-cartridge job where a stuck part or an unknown valve raises the difficulty.
How much water and money does a failed diverter waste?
According to Dalmatian Plumbing, a failed diverter wastes on the order of 15 to 30 gallons per shower and roughly $100 to $200 a year, because water leaks continuously out the spout during every shower.
A failed diverter wastes water on every shower because the water that should all go up to the head instead splits, with a portion running uselessly out the tub spout and straight down the drain. According to Dalmatian Plumbing's figures, that loss is on the order of 15 to 30 gallons per shower, and it accumulates into roughly $100 to $200 a year on the water bill. Those figures come from a single trade source and are cited here as that source's estimate rather than as an independently established standard.
The mechanism behind the waste is the incomplete seal. Because the diverter gate no longer closes off the spout, every shower runs with water continuously escaping out the spout the whole time the shower is on, so the waste is not an occasional drip but a steady loss for the full duration of each shower. Multiplied across the showers a household takes in a year, a per-shower loss of 15 to 30 gallons adds up to the annual figures Dalmatian Plumbing cites.
This continuous, use-linked waste is what makes a failed diverter worth fixing promptly rather than tolerating. Unlike a slow drip that wastes a little around the clock, a diverter leak wastes a substantial slug of water on every single shower, so the loss scales directly with how much the shower is used — a frequently used family shower wastes the most. The water running out the spout is also why the shower itself feels weak, so the waste and the performance complaint are the same problem.
Set against the cost of the fix, the waste makes the repair easily worthwhile. A tub spout is an inexpensive part and a simple swap, and even a cartridge replacement is modest, while the wasted water — by Dalmatian Plumbing's estimate, $100 to $200 a year — recurs for as long as the diverter is left unsealed. Fixing it stops both the waste and the weak-shower symptom at once, which is the practical case for not living with a diverter that leaks out the spout.
How is a shower diverter diagnosed step by step?
Confirm water runs from both outlets at once, identify the diverter type, descale the spout with vinegar first, then replace the spout or the cartridge if cleaning does not restore the seal.
The diagnosis starts by confirming the symptom: with the diverter engaged to send water to the showerhead, check whether water is also running out of the tub spout at the same time. Water from both outlets at once is the defining sign of a failed diverter, and it distinguishes the problem from a clogged head or a pressure issue, both of which leave the spout dry. Confirming both outlets are flowing is what points the repair at the diverter rather than elsewhere.
The second step is to identify which type of diverter it is, because that sets the repair path. If the control is a knob you pull up on the tub spout, it is a tub-spout diverter; if it is a separate handle on the wall, it is an in-wall diverter valve. This identification determines whether the eventual part is a spout or a cartridge, so it is worth settling before any disassembly.
The third step is to descale before replacing anything, because mineral buildup is the most common cause. Soak the spout in white vinegar — a bag tied over it or the spout removed and submerged — for several hours, work the diverter through its travel, then flush and retest to see whether the seal returns. A large share of diverter complaints resolve at this step for the cost of vinegar alone, which is why it comes before buying parts.
The fourth step is to replace the part the type calls for if descaling did not restore the seal: the whole tub spout for a tub-spout diverter, or the cartridge for an in-wall valve. A spout swap is simple and accessible; a cartridge replacement is more involved and depends on matching the part, and a seized cartridge or an unfamiliar valve is the point to book faucet and fixture repair in Bellevue. If the shower is also weak with the spout sealed, check the head and valve cartridge per our no pressure in the shower guide.
Common questions about a shower diverter not working
Water from both outlets means the diverter gate failed to seal. Soak the spout in vinegar first; replace the spout for a spout-type diverter or the cartridge for a wall valve. Yes, fix it.
Water coming out of both the tub spout and the showerhead at the same time means the diverter gate has failed and can no longer seal off the spout, so the flow splits between the two outlets instead of going entirely to the head. That both-outlets symptom is specific to the diverter — a clogged head or a pressure problem leaves the spout dry — so it points the repair straight at the diverter, after a vinegar descaling to rule out mineral buildup first.
Whether you replace the spout or the cartridge depends on the diverter type. A tub-spout diverter, the pull-up knob on the spout, is fixed by replacing the whole spout — an inexpensive, simple swap, since the gate is built into the spout. An in-wall diverter valve, operated by a separate wall handle, is fixed by replacing the cartridge behind that handle — a more involved repair that depends on matching the part. Identify the type by where the control is: a spout knob or a wall handle.
Yes, a failed diverter is worth fixing, both for the water it wastes and the weak shower it causes. According to Dalmatian Plumbing, a failed diverter wastes on the order of 15 to 30 gallons per shower and roughly $100 to $200 a year, because water leaks out the spout continuously during every shower — which is also why the shower feels weak. A tub spout is a cheap part and a simple swap, so the repair pays for itself against the ongoing waste.
The spout-type and valve-type diverters are the two designs, and the difference is where the diverter lives: in the spout itself versus in a valve behind a wall handle. Start every diverter repair with a white-vinegar soak, since mineral scale holding the gate open is the most common cause and descaling often restores the seal for free. When cleaning does not work and the fix is a wall-valve cartridge — especially a seized one or an unfamiliar valve — book it as faucet and fixture repair in Bellevue.
Sources
Every fact in this guide cites a verifiable public source. If you find a number we got wrong, email dispatch@bellevueplumberpro.com.
- Nick's Plumbing — Why does water come out of the tub spout and showerhead at the same time
- Dalmatian Plumbing — Shower diverter water waste (15-30 gal/shower, $100-200/yr)
- Gerber — Tub spout diverter operation and replacement
- Great Plumbing Co — How to fix a shower diverter (descale, replace spout or cartridge)
- Kingston Brass — Tub spout and diverter installation guidance
- Sunrise Specialty — Types of shower diverters and how they work
Need help with this in your home? See our Faucet and fixture repair in Bellevue page for pricing, our diagnostic process, and how same-day service works across the Eastside.
Related services: Leak Detection and Pipe Repair.
Related guides
